
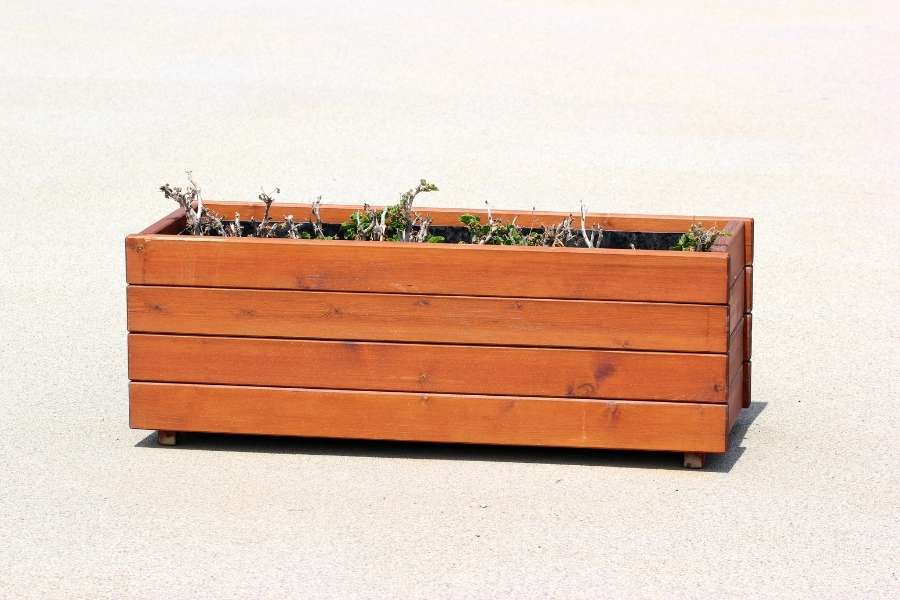
Imagine stepping outside onto your bare patio stone. You hold a warm mug of morning coffee. Wouldn’t crisp greens or bright red blooms look amazing right there? You can create that vibrant sanctuary with your own two hands. Building a simple planter box changes everything for your outdoor living space.
Learning how to build a simple wooden planter box brings fresh energy straight to your terrace. It requires only basic carpentry skills and a free afternoon. Let us pick up our tools and bring your garden vision to life today.
Selecting Durable Lumber for Lasting Patio Performance
Great outdoor carpentry always begins with smart material choices. Picking the wrong boards leads to warped panels and rotted bottoms after a single rainy season. You need lumber that shrugs off water, damp earth, and intense summer sun. Just as routine outdoor plumbing fixes require proper planning, much like learning how to unclog a bathtub drain without removing the stopper to avoid water pooling, choosing moisture-tolerant timber prevents water stagnation and structural decay in garden containers. Investing in high quality timber saves you money and rebuilding time down the road.
Exterior timber must withstand constant moisture, seasonal temperature swings, and stubborn garden pests. Take a moment to evaluate your best lumber options before heading to the lumberyard.
Exploring the Best Wood Types for Outdoor Garden Planters
Different wood species offer distinct strengths when left out in the elements. Untreated pine decays quickly when wet soil rests against it. High-tannin and naturally oily wood species provide far better protection:
- Cedar Wood Planks: Cedar resists rot and garden insects naturally without any chemical treatments.
- Redwood Lumber: Redwood stays remarkably flat and resists splitting under hot, humid weather.
- Cypress Boards: Sourced from southern wetlands, cypress delivers superb moisture protection for years.
- Pressure-Treated Pine: This affordable timber deters termites, making it great for hidden internal supports.
Working with cedar wood planks delivers the ideal mix of lightweight handling and rustic beauty. Cedar smells incredible while you cut it. Best of all, it keeps your edible kitchen herbs safe from synthetic toxins.
Your budget often dictates which wood species you place in your shopping cart. Cedar costs more than common pine, but it lasts ten years or longer outdoors. That extra durability makes it well worth the initial investment.
Quality boards stay straight throughout summer heatwaves and winter freezes. Take time to sight down each board edge at the store. Reject boards that show heavy cupping, splits, or loose knots.
Essential Tools and Precision Saws for Clean Cuts
You do not need a massive commercial workshop to construct this garden container. A handful of standard tools will get the job done properly. The fundamentals here mirror other introductory home crafts, such as learning to build own wooden floating shelves using square alignment and secure wall anchors. Having the right cutting gear on hand makes the work flow smoothly from start to finish. Good tools also keep your project safe, accurate, and fun.
Accurate cutting tools turn rough wood into snug, attractive joints. Take time to set up your work area properly before cutting anything.
Mastering the Miter Saw Cut for Perfect Corners
Square edges make every step of your assembly process much easier. Making a crisp miter saw cut at ninety degrees ensures your side walls meet cleanly. A carbide-tipped blade glides through soft cedar without splintering delicate grain edges. Always secure your boards firmly against the saw fence before pulling the trigger.
Precision cuts prevent uneven gaps that let wet potting soil spill out. Keep your work table clean of sawdust piles as you work. Clear surfaces prevent measuring mistakes and keep your cuts straight.
Wear sturdy work gloves, ear muffs, and wrap-around safety glasses during cutting steps. Flying sawdust can irritate your eyes and lungs quite quickly. Working safely keeps your weekend project enjoyable and injury-free.
Double-check every single measurement before swinging your saw blade down. Remember the old carpenter rule: measure twice, cut once. That simple habit prevents wasted lumber and unnecessary trips back to the store.
Step-by-Step Construction Guide for Outdoor Success
Assembly goes quickly once you cut all your wood pieces to exact dimensions. Take your time to pre-drill every screw hole before driving fasteners. Cedar splits easily if you force screws directly into raw board ends. A calm, methodical pace guarantees a sturdy, beautiful container.
Follow this simple assembly workflow to complete your DIY cedar planter box for outdoor patio retreat:
- Cut eight side wall slats to twenty-four inches in length.
- Cut eight end wall slats to twelve inches in length.
- Fabricate four vertical corner cleats to ten inches from square stock.
- Pre-drill countersunk pilot holes through the ends of each slat.
- Fasten horizontal slats directly to your vertical corner cleats.
- Join all four wall panels together into an open rectangle.
- Install internal base support rails along the bottom inside walls.
- Drop loose floor slats into place across the support rails.
Keep checking your assembly corners with a metal speed square as you build. Square corners ensure your finished container sits flat on the patio without wobbling.
Clamp panels securely together before driving your fasteners into place. Clamps act like an extra pair of steady hands in the shop. They keep joints tight while you focus on driving screws straight.
Take a light sanding block across the top rim of the container. Knocking down sharp wood corners prevents painful splinters later on. Smooth edges make moving and planting your box much more pleasant.
Building a simple planter box by hand gives you genuine pride of craftsmanship. You can customize the final dimensions to match your patio furniture perfectly. It fits nicely alongside outdoor chairs, railings, and stone fire pits.
Choosing Fasteners and Protective Clear Sealants
Standard interior drywall screws quickly rust when exposed to outdoor moisture. Corroded metal snaps easily, leaving ugly black streaks along your clean wood grain. You need durable hardware designed specifically to survive continuous outdoor exposure. Quality hardware holds your project together firmly through wind, rain, and snow.
Invest in high-grade coated or stainless-steel exterior screws for this build. Ceramic-coated star drive screws bite deeply without stripping out screw heads. They resist rust and keep your joints tight under heavy soil loads.
Screws holding three or more boards together need adequate length. Two-inch fasteners provide plenty of holding power inside soft cedar cleats. Stainless steel costs slightly more, but it never leaves rust stains.
Protecting the exterior wood surface keeps your container looking fresh for seasons. Sunlight breaks down raw cellulose fibers, turning rich wood into a dull silver-gray. Applying a quality weather resistant sealant preserves natural color tones while blocking rain absorption.
Choose plant-safe penetrating oils made from tung oil or raw linseed. These non-toxic oils soak into wood fibers without leaching chemicals into moist soil. Wipe the oil on with a clean cotton rag, then let it dry.
Reapplying oil once each spring keeps the wood grain supple and protected. Regular maintenance stops boards from checking, cracking, or curling over time. Five minutes of care each year extends container life by a decade.
A beautiful natural finish highlights every subtle swirl in the cedar grain. Your finished container looks like a premium designer piece from an upscale garden catalog.
Ensuring Moisture Management and Internal Soil Health
Trapped water kills potted plant roots faster than almost anything else. Plant roots need oxygen just as much as they need moisture. Without proper drainage, water collects at the bottom and suffocates delicate root systems. Healthy root systems require loose, aerated, well-draining soil mixtures to thrive.
Excess moisture also attacks your wooden floor slats from the inside out. Good drainage paths protect both plant health and your woodworking craftsmanship.
Drilling Adequate Drainage Holes in Container Bases
Drilling plenty of drainage holes across the bottom slats prevents dangerous water accumulation. Use a half-inch spade bit to make holes every five inches along floor panels. These wide drainage holes allow heavy rainwater to drain away freely beneath your container.
Space floorboards with a slight quarter-inch gap between them for extra drainage. This simple gap stops standing water from pooling inside lower corners. It also allows floor boards to expand naturally without buckling outward.
Elevate your container slightly off the patio floor using small rubber feet. Raising the box lets air circulate underneath, drying out wood after rains. It also prevents moist dirt rings from staining your clean patio stones.
Good drainage keeps potting soil sweet-smelling and full of beneficial soil life. Root rot becomes a non-issue when excess moisture leaves immediately. Your flowers and herbs will reward your preparation with rapid, lush growth.
Lining Your Box to Extend Timber Longevity
Direct contact between wet soil and wood boards speeds up natural decay. Even rot-resistant cedar lasts significantly longer when protected by an internal moisture buffer. A practical barrier keeps damp earth isolated from your exterior side panels.
Installing a sturdy wood planter liner made of landscape fabric works wonders. Porous geotextile fabric lets air and water pass while holding potting soil in place. Never use solid plastic sheeting, as trapped water creates foul root rot.
Smooth the fabric along inside walls and corners using your hands. Fasten the material using a staple gun loaded with stainless-steel staples. Place staples every three inches along the upper rim to prevent sagging.
Trim away excess fabric along the top rim with a sharp utility knife. Hide the raw fabric edge an inch below the top board line. This keeps your fabric invisible once you fill the container with soil.
This fabric barrier also stops fine soil from washing through bottom drainage holes. Your patio stones stay spotless after heavy watering sessions or sudden storms. It provides an ideal growing environment while keeping cleanup chores to a minimum.
Calculating Optimum Soil Capacity for Balcony Safety
Container soil gets remarkably heavy once soaked with water after a storm. Calculating container weight matters if you plan on placing your box on elevated balconies. Balcony structures have strict weight limits that careful gardeners must always respect.
A container measuring two feet long, one foot wide, and one foot deep holds roughly two cubic feet. That total soil capacity weighs about one hundred pounds when fully wet. Keep this weight in mind when choosing your final patio location.
Mix lightweight potting ingredients rather than digging dense topsoil from your yard. Combine coarse peat moss, perlite, and screened compost in equal proportions. This fluffy potting blend holds moisture without compacting into heavy, dense mud.
Perlite creates tiny air pockets that encourage rapid, healthy root development. Compost delivers slow-release organic nutrients that feed plants through the growing season. Peat moss provides moisture retention so you do not have to water twice daily.
Never throw gravel into the bottom of your container before adding soil. Contrary to old myths, gravel creates a perched water table that drowns roots. Fill your container completely with uniform potting mix from bottom to top.
Leave two inches of empty space between the soil line and top rim. This lip keeps water and bark mulch from washing over onto your patio.
Inspiring Patio Gardening and Planting Arrangements
Now comes the most rewarding part of the entire woodworking project. Filling your handmade cedar container brings immediate color, texture, and fragrance to outdoor spaces. A single container can supply your kitchen with fresh culinary herbs all summer long.
Engaging in patio gardening connects you with nature right outside your back door. You do not need acres of open ground to enjoy homegrown produce:
- Kitchen Herb Mix: Plant sweet basil, curly parsley, garden thyme, and chives together.
- Summer Salad Bowl: Sow butterhead lettuce, spicy arugula, red radishes, and sweet baby spinach.
- Vibrant Flower Display: Mix trailing petunias, golden marigolds, and tall purple salvias for long-lasting blooms.
- Fruiting Miniatures: Try dwarf cherry tomatoes or compact sweet peppers supported by small stakes.
Position taller plants toward the center or back of your container. Place cascading plants along the edges so they spill over the cedar rim. This layering technique gives your container a lush, professionally designed appearance.
Water your container thoroughly right after planting to settle loose soil around root balls. Add more soil mix if settling reveals exposed plant roots. Top the soil surface with shredded cedar bark to conserve moisture during hot weather.
Pick fresh herbs in the morning when essential oil concentrations peak. Frequent harvesting encourages bushier growth and prevents plants from going to seed too early. Your outdoor patio will quickly become your favorite spot to relax each evening.
Expanding Your Carpentry with Easy Woodworking Projects for Balcony and Garden
Completing your initial garden container builds real confidence with power tools and lumber. A simple planter box teaches you core carpentry skills that apply to many other home projects. You now understand how to cut square, pre-drill pilot holes, and apply protective finishes.
Take on more easy woodworking projects for balcony and garden spaces next weekend. Try building a matching potting bench to store bags of soil and hand tools. Craft a vertical climbing trellis to support sweet peas, morning glories, or runner beans.
You can also construct matching cedar side tables to complete your outdoor seating layout. Basic carpentry lets you customize your living environment without spending thousands at luxury furniture stores. Each completed piece adds handmade warmth, personal character, and functional beauty to your home.
What delicious herbs, crisp salad greens, or vibrant patio flowers will you plant first? Gather your boards, fire up your saw, and build your outdoor garden box today.
Frequently Asked Questions
What is the best wood for an outdoor planter box?
Cedar, redwood, and cypress are the top choices because they naturally resist rot, moisture damage, and insect attacks without harsh chemicals.
How do I prevent my wooden planter box from rotting over time?
Line the inside walls with breathable landscape fabric, drill ample drainage holes, and apply an exterior-grade natural oil sealant annually.
Do I need to line the bottom of my planter box?
Yes, porous landscape fabric keeps loose soil from washing through bottom drainage holes while allowing excess water to escape freely.
